Welcome to the world of DIY beauty! Are you tired of spending money on expensive salon trips for hair removal? Look no further- I have the perfect solution for you. Today, I’ll be sharing a simple and effective sugar wax recipe that doesn’t require any strips. That’s right, you can achieve smooth and hair-free skin in the comfort of your own home with just a few ingredients. Say goodbye to painful waxing sessions and hello to a cost-effective way of achieving silky-smooth skin! Whether you’re new to homemade wax or an experienced DIY-er, this recipe is sure to become your go-to method for hair removal. So let’s get ready to say farewell to those pesky salon appointments and hello to beautiful, touchable skin with our DIY sugar wax without strips!
So, sugar wax recipe without strips?
You can make sugar wax with just a few simple ingredients: sugar, lemon juice, and water. This DIY recipe is a great alternative to expensive salon trips for hair removal. It’s all-natural and gentle on the skin, making it perfect for those with sensitive skin. Plus, it’s easy to make at home and saves you time and money in the long run. So say goodbye to costly salon visits and hello to smooth, hair-free skin!
Understanding the Basics of Sugar Waxing Without Strips
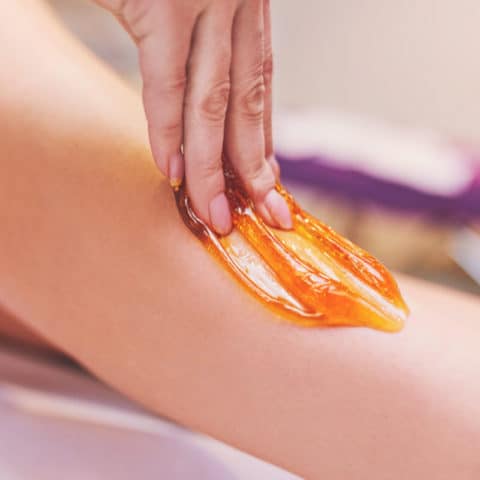
Sugar waxing without strips is a fascinating beauty technique that offers a gentle and natural way to remove unwanted hair. This method utilizes a simple mixture of sugar, lemon juice, and water to create a sticky paste that adheres to the hair rather than the skin. The process is quite straightforward: you heat the ingredients until they form a thick syrup-like consistency, then let it cool down slightly before applying. When you spread this warm sugar paste onto your skin in the direction of hair growth, it clings beautifully to the hairs while remaining easy on your delicate skin.
When it’s time for removal, you simply flick your wrist upward against the direction of hair growth. One of the big perks of this method is its ability to minimize irritation compared to traditional waxing with strips. Because sugar wax only sticks to hairs and not dead skin cells, it results in less redness and discomfort. Additionally, since all ingredients are natural, there’s peace of mind knowing you’re using something safe on your body!
Overall, mastering sugar waxing without strips can lead to smoother skin and an enjoyable self-care ritual—perfect for anyone looking for effective yet gentle hair removal options!
Preparing Your Skin Before Using the DIY Sugar Wax Recipe
Before diving into the world of DIY sugar waxing, it’s essential to take a few steps to prepare your skin. Start by gently exfoliating the area you plan to wax. This helps remove dead skin cells and allows for a smoother waxing experience. You can use a soft scrub or even a washcloth; just be sure not to scrub too hard, as that might irritate your skin. After exfoliation, cleanse the area with warm water and mild soap to eliminate any oils or dirt that could interfere with the sugar wax’s grip on your hair.
Once your skin is clean and smooth, consider applying a light dusting of cornstarch or baby powder. This step is vital because it absorbs excess moisture, allowing the sugar wax to adhere better to the hair rather than slipping away on damp skin. Lastly, make sure you’re in an environment where you feel relaxed; stress can lead to muscle tension and discomfort during waxing sessions. With these preparations in place—exfoliating first, cleansing thoroughly, and then ensuring dryness—you’ll set yourself up for success when applying your homemade sugar wax.
Enjoy this fun process while pampering yourself!
Read also: essential oils for hives
Creating Your Own Sugar Wax Recipe at Home
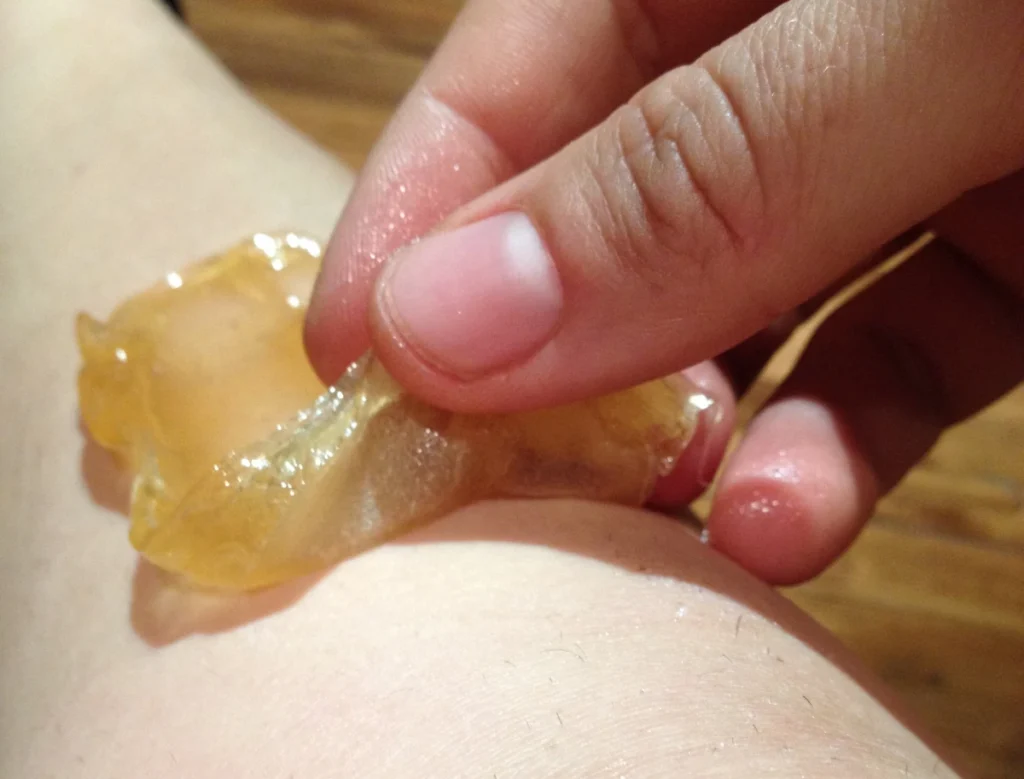
Making your own sugar wax at home can be a fun and rewarding experience. Sugar waxing, often called sugaring, is a natural method of hair removal using just a few simple ingredients. To begin, gather granulated sugar, water, and lemon juice. The basic recipe involves mixing one cup of sugar with two tablespoons of lemon juice and about two tablespoons of water in a saucepan. As the mixture heats over medium heat, it will bubble and eventually turn into a thick golden syrup. Keep an eye on it; if it gets too dark or hardens too much when cooled, you may have to start again.
Once you’ve achieved that perfect honey-like consistency, let the mixture cool down until it’s warm but not hot enough to burn your skin. You can test this by dipping your finger in; if it feels comfortable, you’re good to go! To apply the wax effectively, simply use your fingers or a small spatula to spread it onto clean skin in the direction of hair growth. Then quickly peel back against the grain for smooth results! This delightful DIY project not only saves money but also uses ingredients that are gentle on your skin—making it an excellent choice for those sensitive to commercial products.
Maintaining Smooth, Hair-Free Skin After Sugar Waxing
Getting sugar waxed is a delightful way to achieve smooth, hair-free skin. However, the journey doesn’t end once you step out of the salon; proper aftercare is essential for maintaining that silky feel. To keep your skin looking its best, it’s crucial to stay hydrated and moisturized. Drinking plenty of water helps your body flush out toxins while also nourishing your skin from within. Afterward, apply a gentle moisturizer or natural oil like coconut or almond oil to soothe and hydrate the newly exposed skin. This not only locks in moisture but also creates a protective barrier against potential irritants.
In addition to hydration, avoiding certain activities can safeguard your freshly waxed areas. For instance, steer clear of direct sunlight for at least 24 hours as UV rays can cause irritation and darken sensitive skin. It’s wise to skip intense workouts right after waxing too; sweat may lead to clogged pores and discomfort during this vulnerable time. Regular exfoliation using mild scrubs about two days post-waxing helps prevent ingrown hairs by sloughing off dead cells without irritating your delicate skin further.
By following these simple steps with care and attention, you’ll enjoy long-lasting smoothness that makes every day feel luxurious!
You may also like: shea butter for dark spots
Conclusion: Reaping The Benefits of Homemade Sugar Wax Without Strips
Making your own sugar wax at home is a delightful and rewarding experience. This simple method uses just three ingredients: sugar, water, and lemon juice. You combine these elements in a saucepan over medium heat until everything blends together into a golden syrup. The magic happens as the mixture simmers; it thickens like honey, filling your kitchen with a sweet aroma that hints at the natural beauty treatment you’re about to enjoy. Once cooled slightly, you can knead the warm paste into a soft ball ready for use.
The greatest advantage of homemade sugar wax is its gentle touch on your skin. Unlike traditional waxing methods that often require strips and can irritate sensitive areas, this technique allows you to apply the wax directly with your fingers for precise control.
Additionally, since it’s made from edible ingredients, there are no harsh chemicals involved. With regular use, many find their hair grows back finer and sparser over time—an added bonus! Not only does this process promote smooth skin without breakage or ingrown hairs but also makes waxing an easy DIY project that fits seamlessly into your self-care routine.
Embrace this natural choice and enjoy silky skin while knowing exactly what goes into your beauty regimen!