Are you looking to pamper your skin with a luxurious soap that’s also natural and gentle? Look no further, because I have the perfect solution for you – a DIY Shea Butter Soap Base! This easy recipe allows you to create your own nourishing and moisturizing soap base using shea butter, an ingredient known for its hydrating properties. No need to spend money on expensive store-bought options when you can make your very own batch at home.
In this article, I’ll share with you my simple yet effective shea butter soap base recipe that will leave your skin feeling soft and supple. We’ll discuss the benefits of using shea butter in our skincare routine, as well as the step-by-step process of making this luxurious soap base. So get ready to indulge in some self-care time while creating a personalized product just for you! Let’s dive into the world of handmade soap-making together!
So, shea butter soap base recipe?
Shea butter soap is a luxurious and nourishing option for those looking to pamper their skin. While it can be purchased in stores, making your own shea butter soap base at home allows you to customize the ingredients and create a truly unique product.
To make your own luxurious shea butter soap base, you will need:
– 1 cup of shea butter
– 1 cup of coconut oil
– 1/2 cup of olive oil
– 1/4 cup of lye (sodium hydroxide)
– Distilled water
– Essential oils (optional)
Step 1: Prepare Your Work Area
Before starting any DIY project, it’s important to prepare your work area. Lay down some newspaper or plastic wrap on a flat surface to protect it from any spills or messes. Make sure you have all the necessary equipment within reach.
Step 2: Measure Out Your Ingredients
Measure out one cup each of shea butter and coconut oil, as well as half a cup of olive oil. These three oils will form the base of your shea butter soap.
Step 3:Mix Your Oils Together
In a large heat-safe bowl, combine the measured oils together. Stir gently until they are evenly mixed.
Step 4:Add Lye Solution
Next, carefully add the lye solution to the mixture while stirring continuously with a wooden spoon or spatula. The lye solution should be made by mixing equal parts distilled water and lye in a separate container.
Note: Wear protective gloves and eyewear when handling lye as it can cause burns if not handled properly.
Step 5: Blend Until Thickened
Using an immersion blender or hand mixer, blend the mixture until it becomes thick like pudding. This process is called “trace” and indicates that saponification (the chemical reaction between oils and lye) has occurred.
Step 6: Add Essential Oils (Optional)
If you want to add a fragrance to your shea butter soap, now is the time to do so. Add a few drops of your favorite essential oils and stir well.
Step 7: Pour Into Molds
Carefully pour the mixture into molds of your choice. You can use silicone or plastic molds specifically designed for soap making, or even repurpose household items like cardboard boxes or muffin tins.
Step 8:Let It Set
Allow the soap to set in the molds for at least 24 hours. During this time, saponification will continue and the soap will harden.
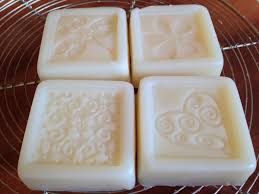
Step 9: Cut and Cure
After 24 hours, remove the soap from its mold and cut it into desired shapes using a sharp knife or cutter. Place these pieces on a drying rack in an airy place for about four weeks to cure fully.
Congratulations! You have just made your own luxurious shea butter soap base. From here, you can customize your bars by adding different scents, colors, exfoliants,
Understanding the Benefits of Shea Butter in Skincare
Shea butter is like a golden treasure for your skin, and it comes from the nuts of the shea tree found in Africa. This creamy substance is packed with vitamins A, E, and F, which work wonders to nourish and protect our skin. When you apply shea butter, it creates a lovely barrier that locks in moisture. It’s especially helpful during those dry winter months when our skin craves hydration. The rich texture feels like a soft blanket enveloping your skin, making it smooth and supple.
Beyond just moisture retention, shea butter has amazing healing properties as well. It contains anti-inflammatory compounds that can soothe irritation or redness caused by conditions such as eczema or psoriasis. Imagine slathering on something that not only feels good but also helps calm your angry skin! Additionally, its natural antioxidants can fight free radicals—those pesky molecules that age us faster than we’d like to admit. Regular use of shea butter can lead to visibly healthier skin over time; many people have even noticed improvements in their complexion’s elasticity and tone! So next time you’re considering skincare options, think about reaching for this luxurious gift from nature.
Exploring the Ingredients for a Luxurious Shea Butter Soap Base Recipe
Creating a luxurious shea butter soap involves selecting the finest ingredients that blend harmoniously to nourish the skin. First and foremost, shea butter itself is a rich source of vitamins A, E, and F. This creamy substance not only moisturizes but also helps in healing dry or damaged skin. When combined with natural oils like olive oil or coconut oil, you get a delicate balance of hydration and lather. Olive oil nourishes the skin deeply while coconut oil adds those fluffy bubbles we all love in our soaps. Additionally, incorporating essential oils such as lavender or eucalyptus can elevate your soap’s aroma and provide aromatherapy benefits that calm the mind.
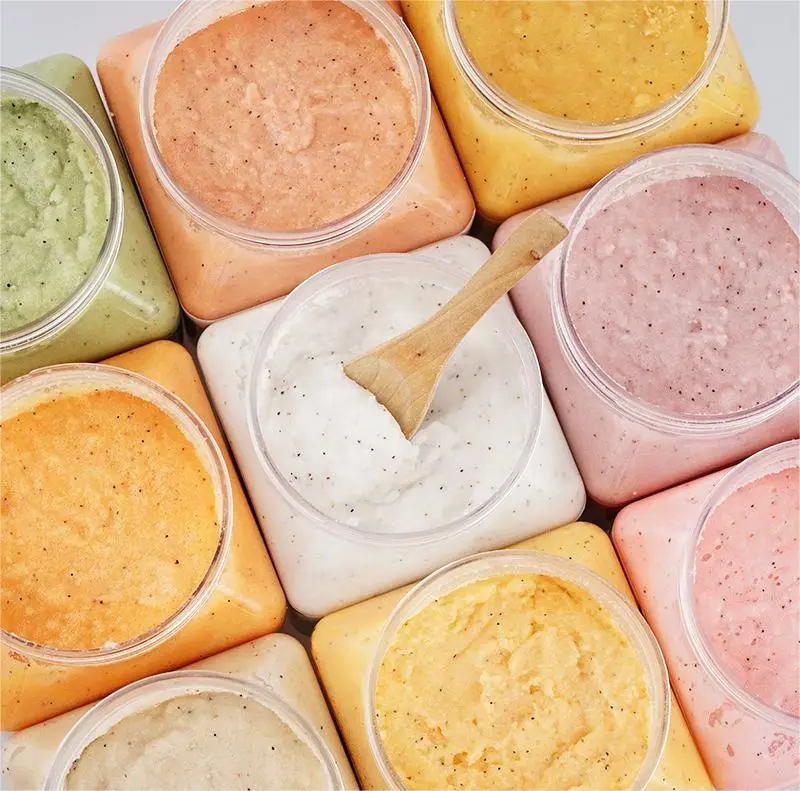
To further enhance your luxurious soap base, consider adding exfoliants like oatmeal or ground coffee for texture and gentle scrubbing power. These ingredients help slough away dead skin cells without being harsh on sensitive areas. For color and visual appeal, you might introduce natural clays—like French green clay—which also offer mineral benefits for healthier-looking skin.
Finally, don’t forget about natural preservatives like vitamin E to keep your creation fresh longer! By blending these elements thoughtfully, you create not just a bar of soap but an indulgent experience every time you cleanse.
Read also: shea butter for dreadlocks
Step-by-Step Guide to Making Your Own Shea Butter Soap Base
Creating your own shea butter soap base is a delightful and rewarding process that allows you to craft something truly unique. First, gather your ingredients: shea butter, distilled water, lye (sodium hydroxide), and any optional additives like essential oils or natural colorants. Start by measuring the lye carefully; it’s important to handle it with care as it can be caustic. Create a lye solution by slowly mixing the lye into the distilled water—always add lye to water, never the other way around! This mixture will heat up quickly due to an exothermic reaction, so give it time to cool down before proceeding.
Once cooled, melt your shea butter in a separate container until it’s completely liquid. Combine the two mixtures together when both are at similar temperatures. Stir gently but thoroughly until you reach a thick consistency known as “trace,” meaning that when you drizzle some of the soap batter on top, it leaves trails for a moment before sinking back in. At this stage, feel free to add any of your favorite scents or colors for personalization. Pour this mixture into molds and allow them to cure in a cool space for 24-48 hours before removing them from their molds and cutting them into bars.
Enjoy using or gifting this luxurious handmade soap!
Enjoying and Sharing Your DIY Luxurious Shea Butter Soap
Making your own luxurious shea butter soap is a delightful experience that not only indulges your senses but also allows you to share a piece of this joy with others. The creamy texture and rich nourishment of shea butter make it an ideal base for crafting soap that leaves your skin feeling soft and hydrated. As you mix the warm, melting fats with essential oils, the room fills with inviting scents like lavender or citrus, instantly lifting spirits. Once you’ve poured the mixture into molds, watching it transform into beautiful bars feels like magic!
Sharing these exquisite soaps can be just as rewarding as making them. You can gift them to friends and family in charming packages adorned with ribbons or personalized labels. Consider hosting a small gathering where everyone gets a bar to take home—creating connections through something so simple yet luxurious brings people together in unexpected ways.
Additionally, sharing tips on how to create different variations opens doors for creativity among loved ones; they might even start their own soap-making adventures! In essence, enjoying and sharing DIY shea butter soap creates memories wrapped in generosity and warmth that last far beyond the scented bars themselves.